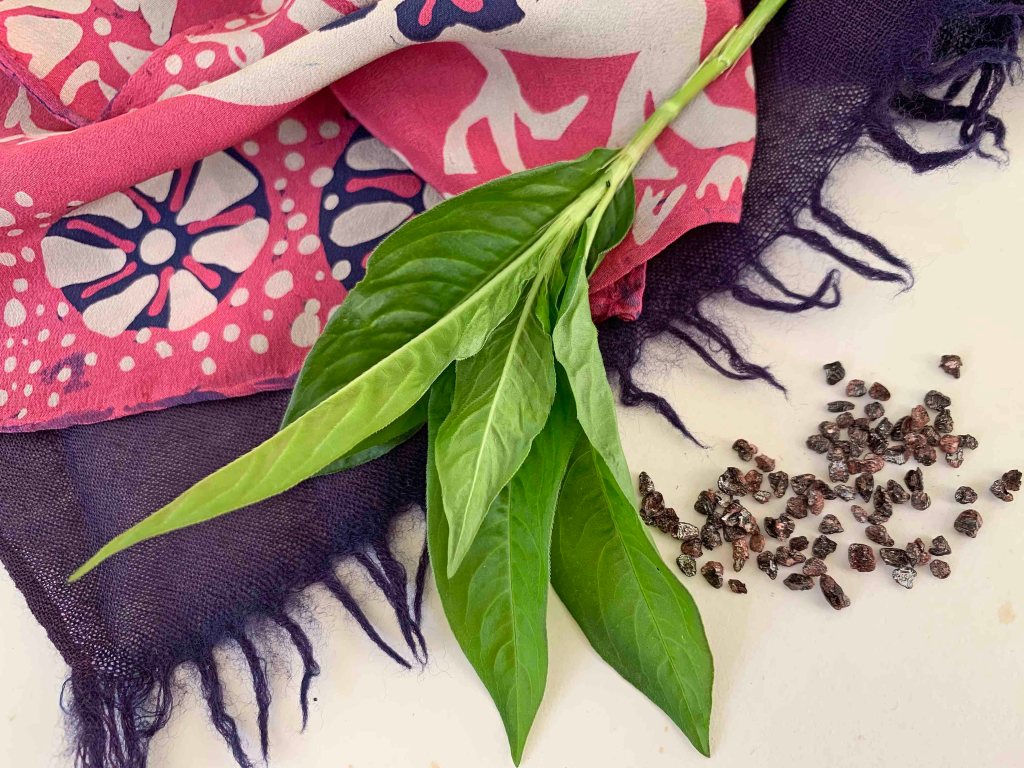
Top left: wax resist scarf dyed in indigo and cochineal; leaves of Persicaria tinctoria and cochineal grains. Underneath left: fringed wool scarf dyed a deep purple in cochineal and indigo
Teaching has so long been off my radar I can’t quite believe that my first course for 18 months is rapidly approaching. I will be at RHS Rosemoor in North Devon on 25th and 26th September for a hands-on introduction to using natural dyes. With a bit of luck students will end up as bonkers as I am about natural colour and its ancient history – and will leave with a great set of dyed samples and a beautiful, individually-dyed scarf.
For overseas readers, RHS stands for the Royal Horticultural Society. The RHS is the UK’s leading gardening charity and owns five beautiful gardens across the country. RHS Rosemoor is one of them and it’s just up the road from me. I have visited it countless times since I moved to Devon nearly twenty years ago. On my visits I often noticed some of the plants that yield dye colour and thought it would be a wonderfully appropriate place to run a course.
In 2019 I contacted the Education and Learning Manager and found her to be very receptive to the idea. The Manager was the late Sarah Chesters, a bright, funny and delightful gardening expert who was also very knowledgeable about textiles and fibre. She was engagingly interested in all I told her about natural dyeing and came to my house on a memorable day when I was working with Jenny Balfour Paul: we showed her how my indigo crop was processed, shared lunch, and we all laughed a lot.
So I was very saddened to hear that Sarah died earlier this year, and I will actively remember her warmth and humour when I am teaching at Rosemoor.
I have been trying to find a more satisfying source of silk than commercial, sparkling white, smooth and ‘perfect’ cloth imported from China. Since last autumn I have been working on mulberry silk, a handwoven ‘heritage’ cloth from India whose export and sale is supporting handweavers in West Bengal. Its natural colour is a pale creamy yellow. Slubs and weave imperfections in the shawls I have chosen are part of their intrinsic beauty.
I mordant the scarves in alum and cream of tartar (unless I’m only dyeing with indigo) and I either dye a pale base or start from the natural silk colour. The wax and dye is worked in layers, with each layer and colour building up a pattern as I block areas out with wax. The designs are loosely based on forms of virus – which are helpful and unhelpful to the human race – and frequently look very pretty through a microscope.
A madder-dyed shawl will be exhibited in the Spring Show at the Devon Guild of Craftsmen, which starts on 29th May
Despite the technique being slow and methodical it isn’t without hazards, mostly due to my senior lapses in concentration. I have overheated the dye vessel (the wax melted); I’ve placed a pattern motif in the wrong place, and I’ve left a small piece of masking tape on the cloth, which efficiently resisted the indigo and left a mark. Because the shawls are expensive I feel very upset when I mess one of them up, but minor wobbles or mistakes reflect the handwoven beauty of the scarves themselves, so I try to be philosophical about it. The cloth is full of slubs, and often shows an uneven density of warp threads which affect the dye take-up. More fibre takes up more dye, so the cloth can have variations in colour. They are utterly fiendish to photograph as they are very lustrous and the colour appears to change all the time.
Shawl below dyed in walnut leaf and indigo
Wax on base layer of straw yellow
A weak indigo vat was used to dye a very pale blue on the yellow
A stronger blue vat was used at layer 4
Layer 4 detail
Layer 5 also showing a dipped border, using a stronger indigo vat
Details of the forthcoming Spring Show at the Devon Guild of Craftsmen here
A whole extra pile of mail arrives before Christmas in many British households. This is the seasonal appearance of greetings cards from family, friends, neighbours, and sometimes local businesses. In my case, several cards represent the sole contact I have with ‘old’ friends and I actively anticipate their arrival to hear everyone’s news. News isn’t invariably happy, of course, and the saddest cards are those that don’t arrive at all.
Wax resist and steam-fixed silk dyes on silk pongee, 2020
Almost without exception this year’s cards express the anguish of the past months and the hope that 2021 will be better. Among my extended friends and family there have been job losses, health and financial crises, cancelled celebrations, stranded travellers and separated families. I also learnt of the cards that will not make an appearance.
Wax resist and steam-fixed silk dyes on silk pongee, 2020
It hasn’t all been bad. One of the better outcomes of the year’s crisis has been the communication enabled by such platforms as Zoom. I chat to student friends regularly, and have caught up with people who live abroad or far away, or I haven’t seen for several years. I’ve attended an online conference, several lectures, an AGM, a charity concert, various makers’ fairs, and yoga classes. I’ve ‘met’ longterm online correspondents – and liked them as much as I thought I would.
Wax resist and steam-fixed silk dyes on silk pongee, 2020
The beautiful summer weather assisted a stellar indigo crop to mature and I had enough left over from dyeing to make pigment, and contribute to a research project into Japanese indigo. In the last couple of weeks I delivered a batch of scarves (pictured above) to the Devon Guild of Craftsmen, an organisation that has courageously fought for survival through 2020 and is attracting good sales now that it has been able to reopen. My studio output this year has been meagre because I have been occupied by the complicated business of everyday living, but it felt good to deliver a few new pieces of work at long last. Dr Denim, my contribution to the Guild’s annual Members’ Exhibition, won the People’s Choice Award in November. You can read about much of this work in previous posts.
Thank you for following, reading, contacting me, and commenting. May all your 2021s be an improvement on this stressful year.
On October 5th I’ll be presenting Deeper than Dyeing at World Textiles Day, Saltford, near Bristol. I’ll outline the influence of World Textiles on my work, and bring a varied selection of textiles (of all kinds) to stop everyone falling asleep.
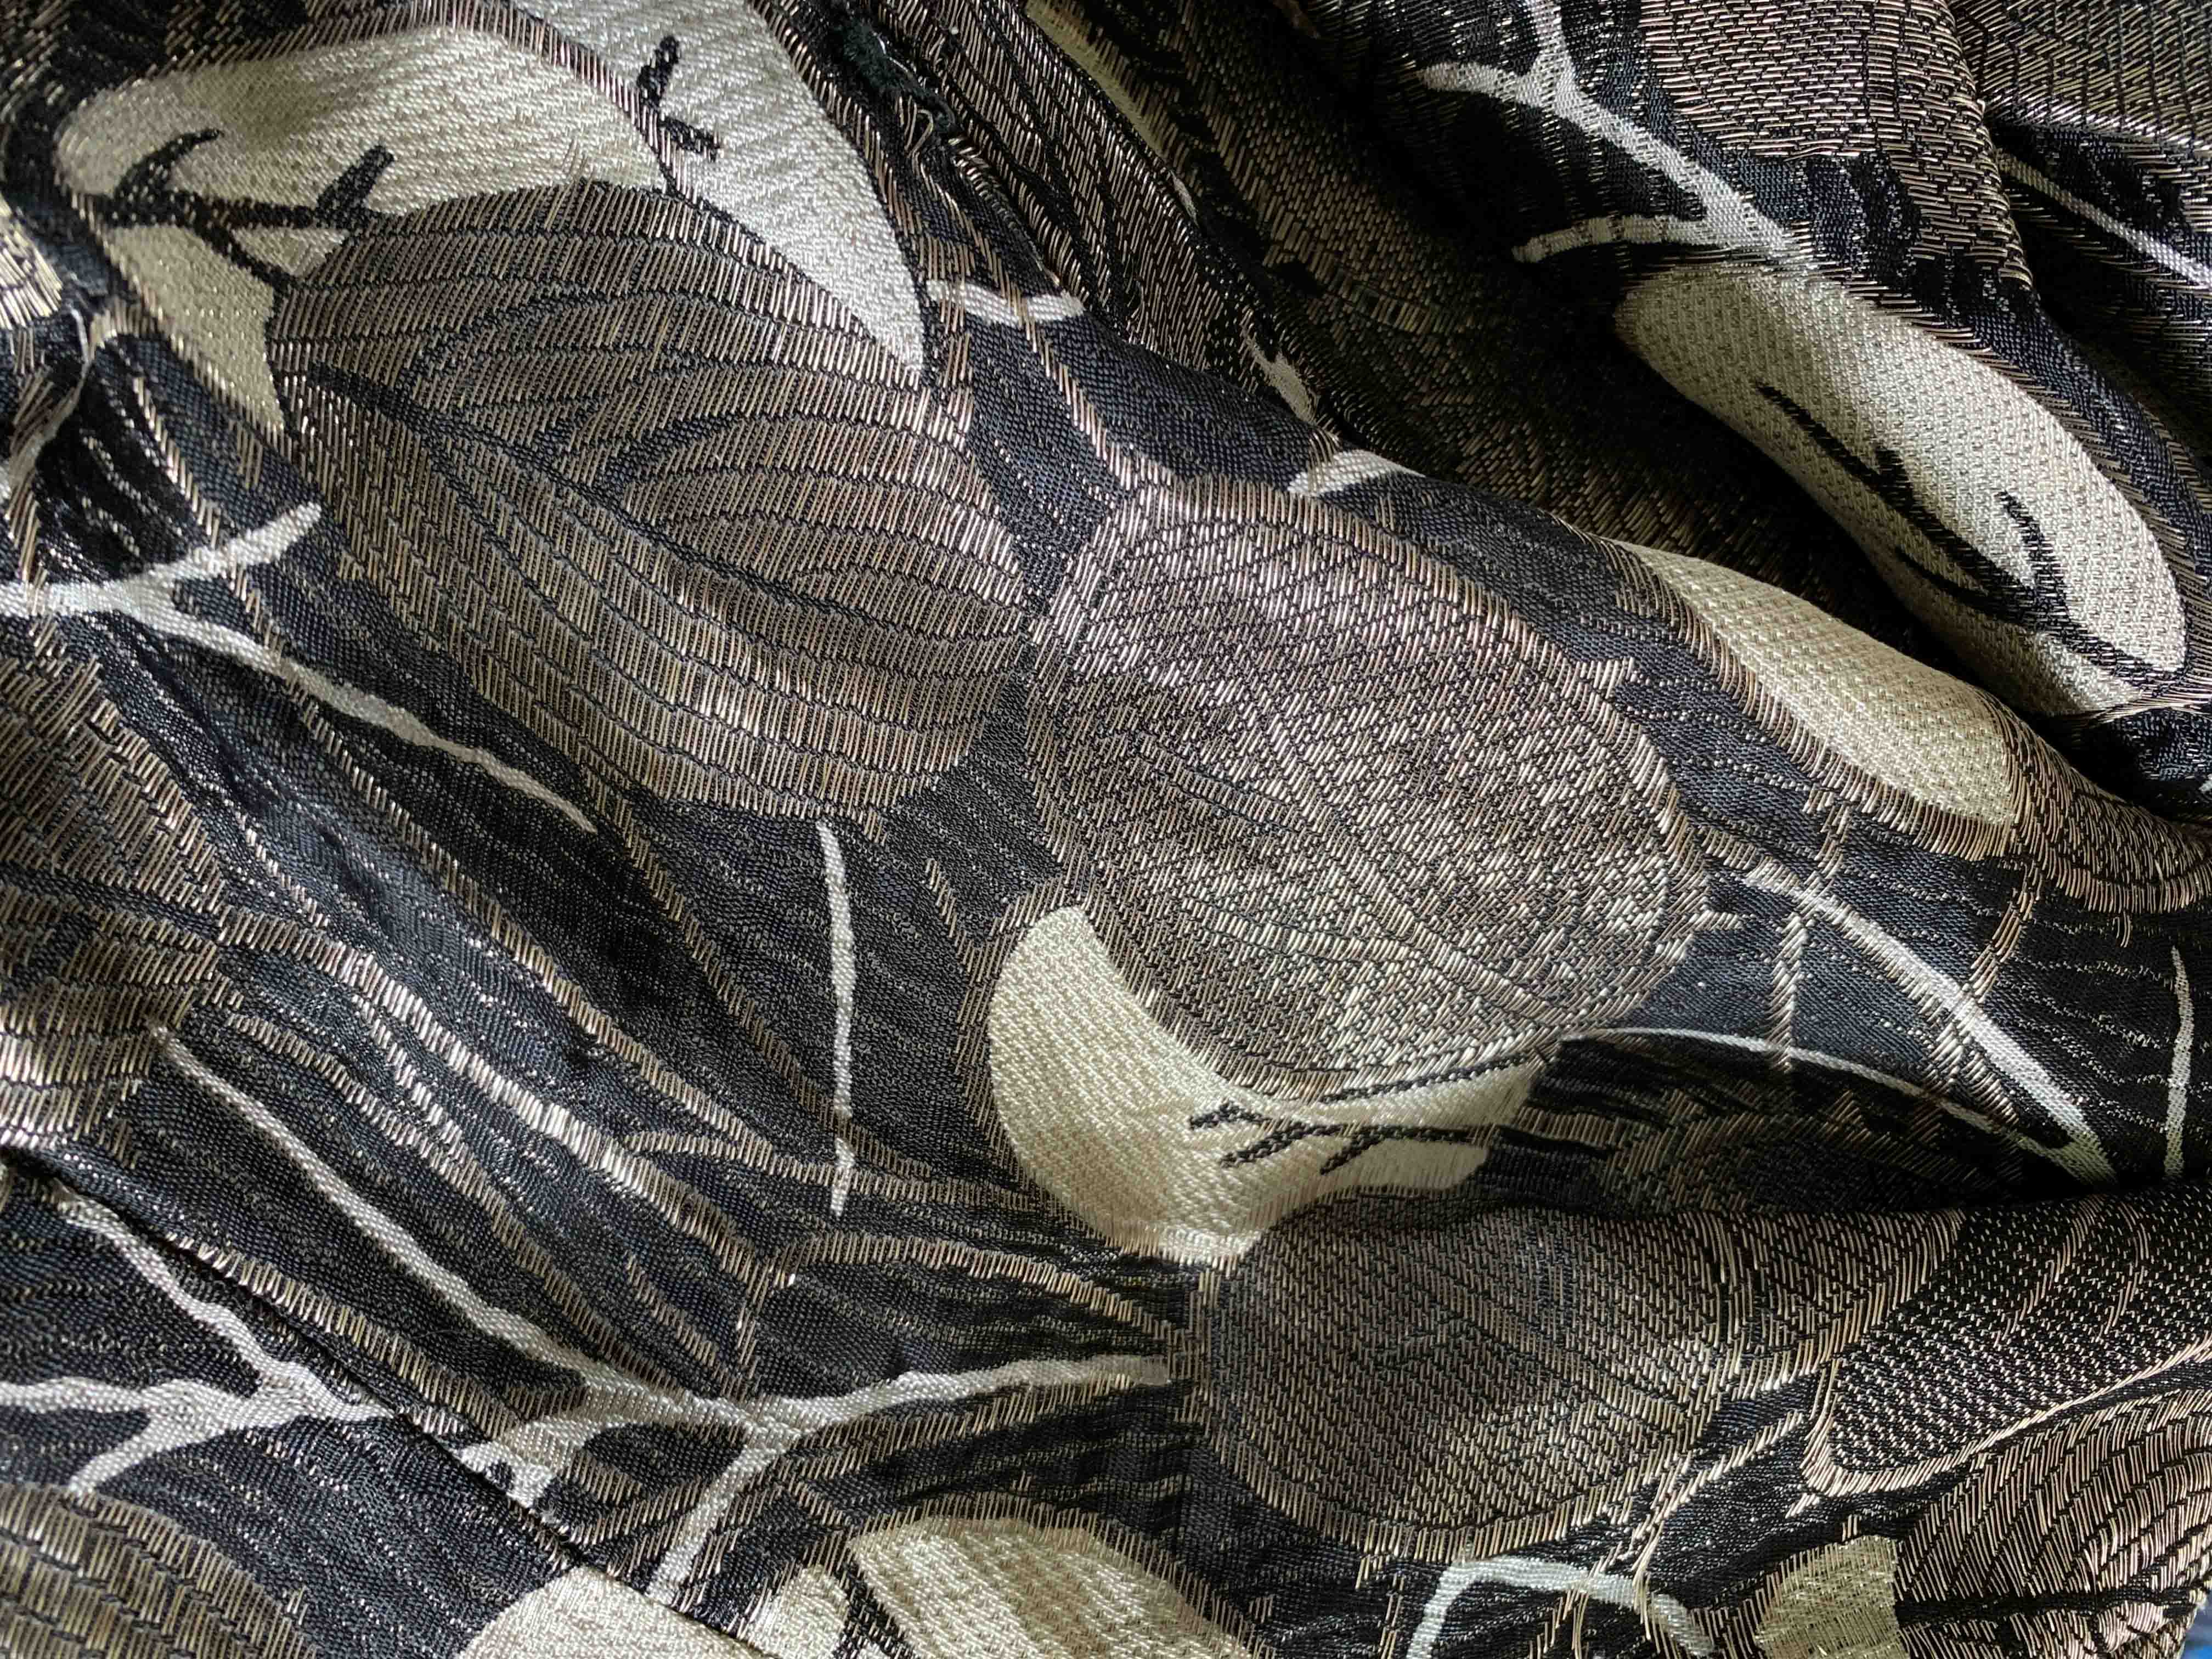
Evening jacket from 1920s – 30s, that belonged to a great-aunt
Some examples go way back to my childhood, such as this gold-and-black-woven evening jacket that belonged to a great-aunt. Others reflect a growing interest in textiles and techniques and tools, acquired not at art college (I studied graphic design), but on travels in India, Indonesia and Australia.
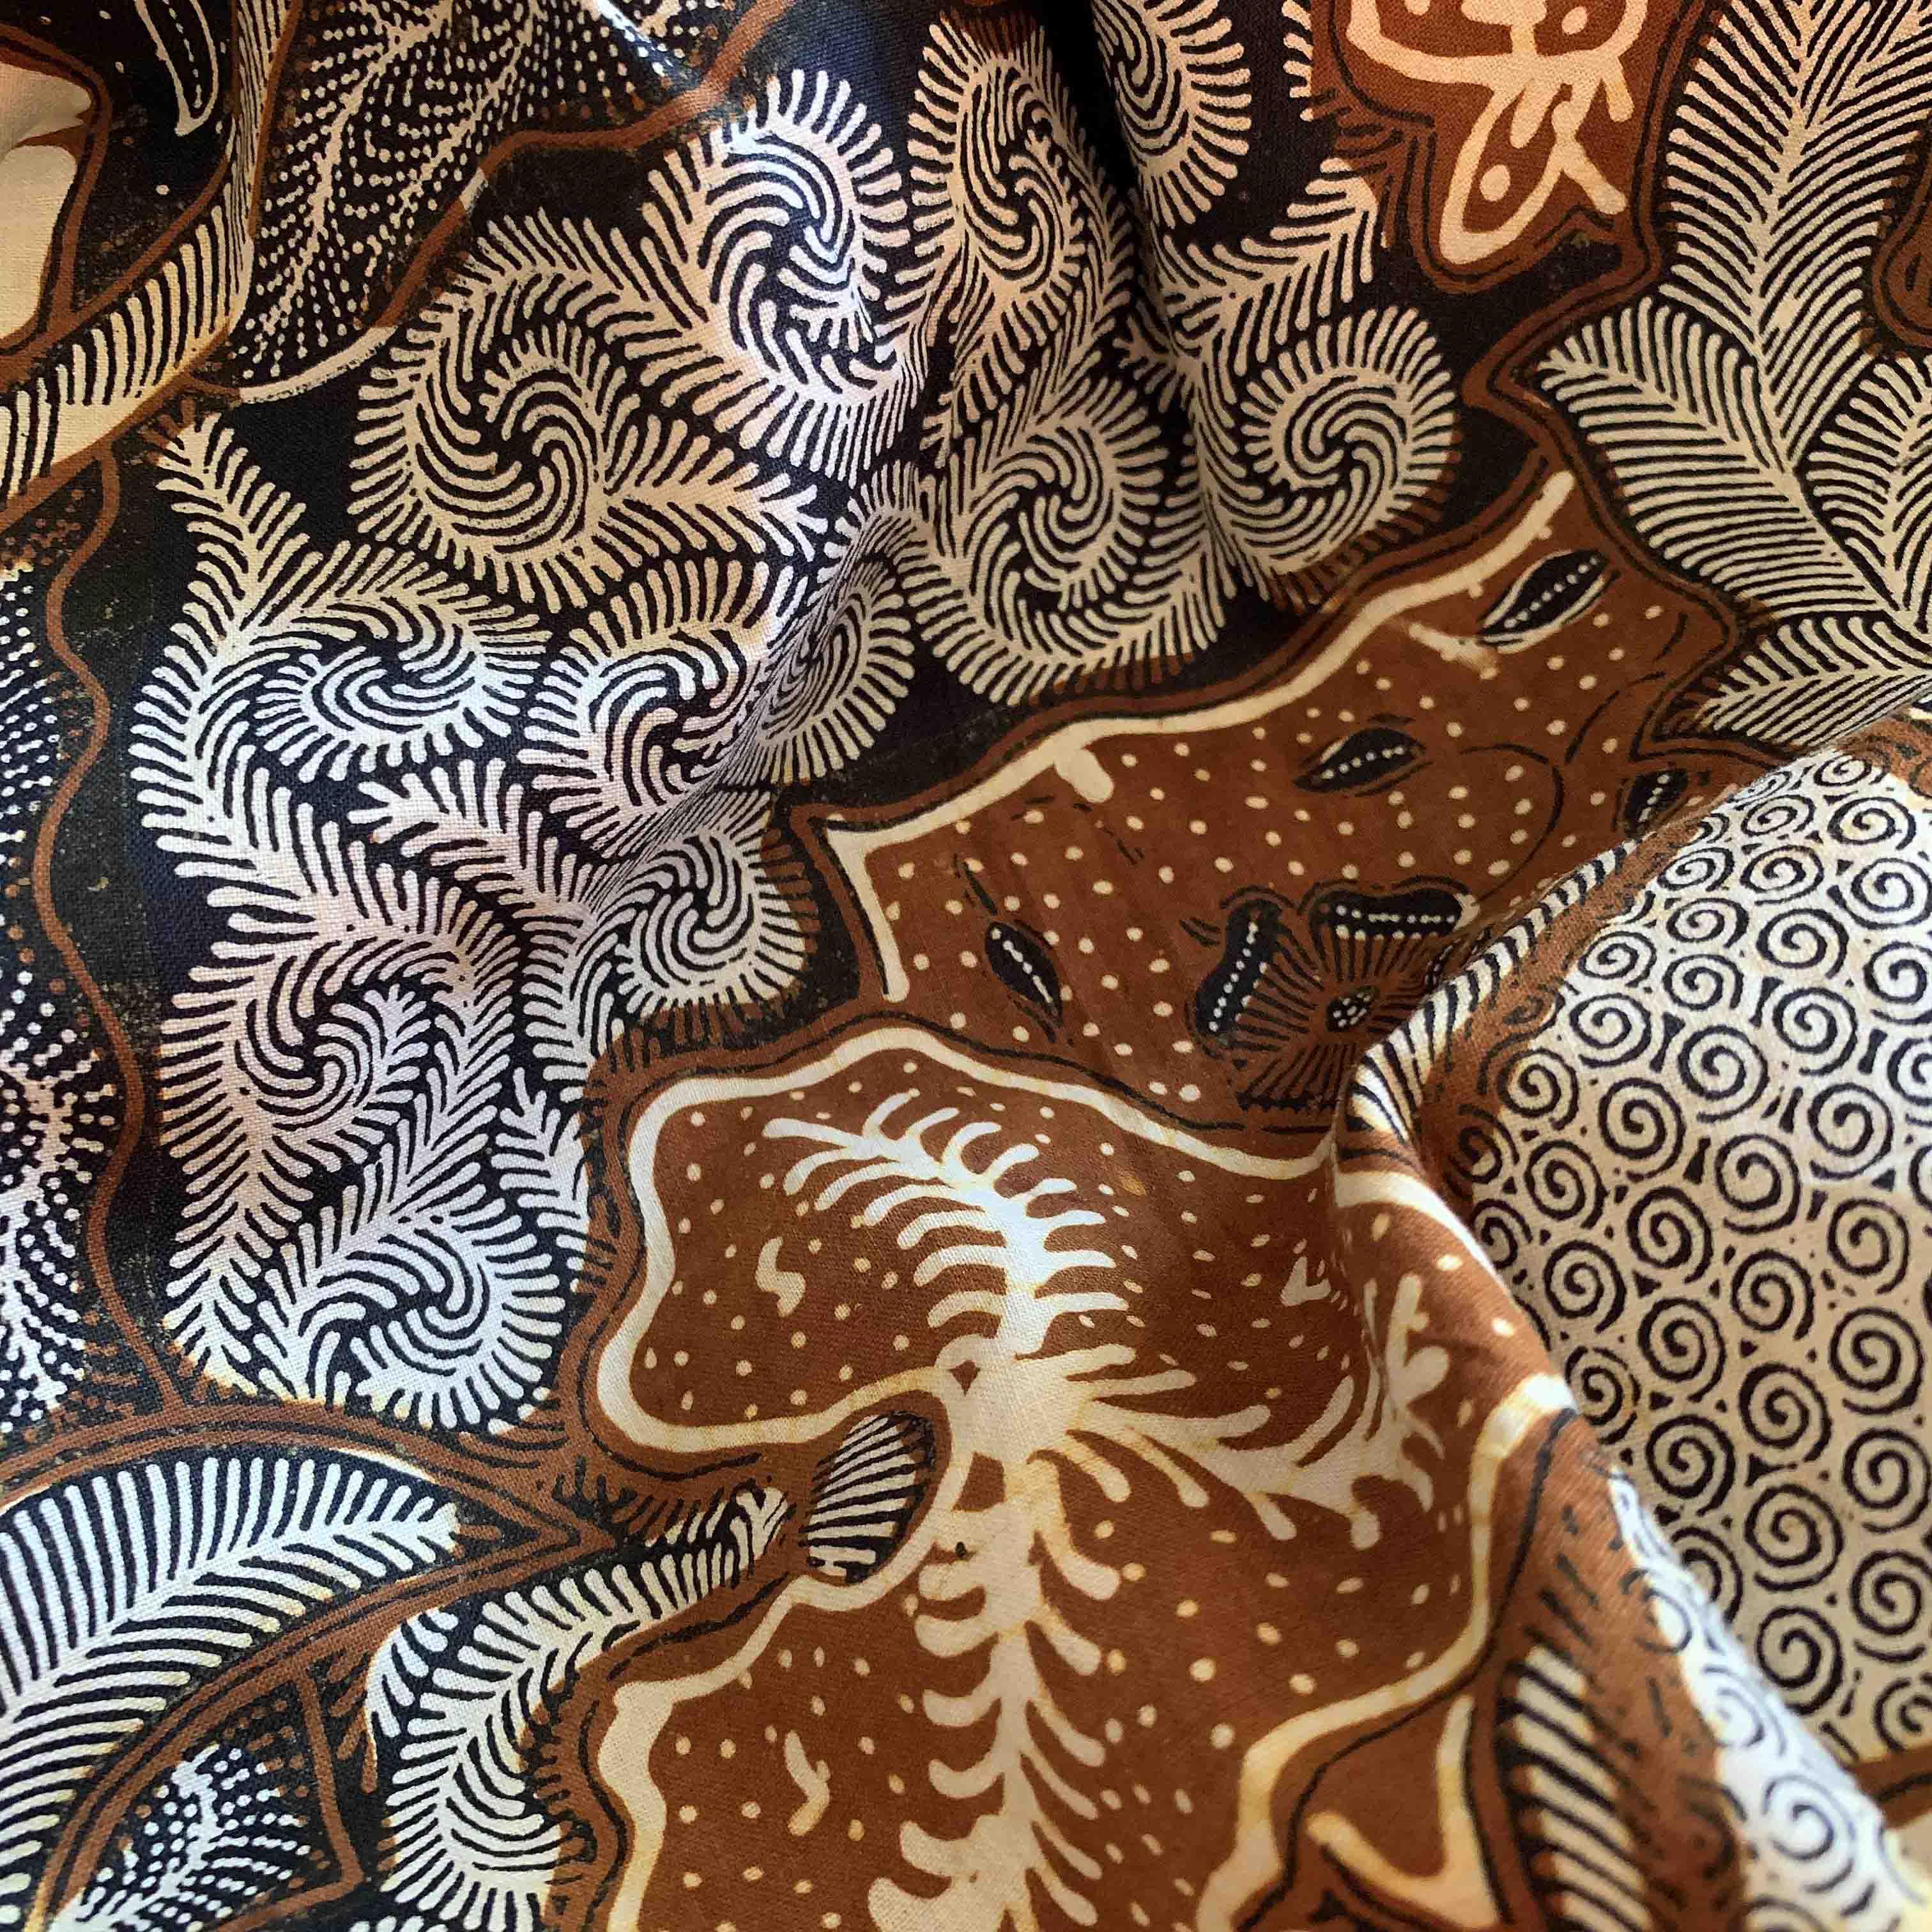
Batik collected in Jogjakarta when travelling in the 1980s
Turban length collected in Rajasthan. It is printed but appears to mimic leheria and mothara techniques
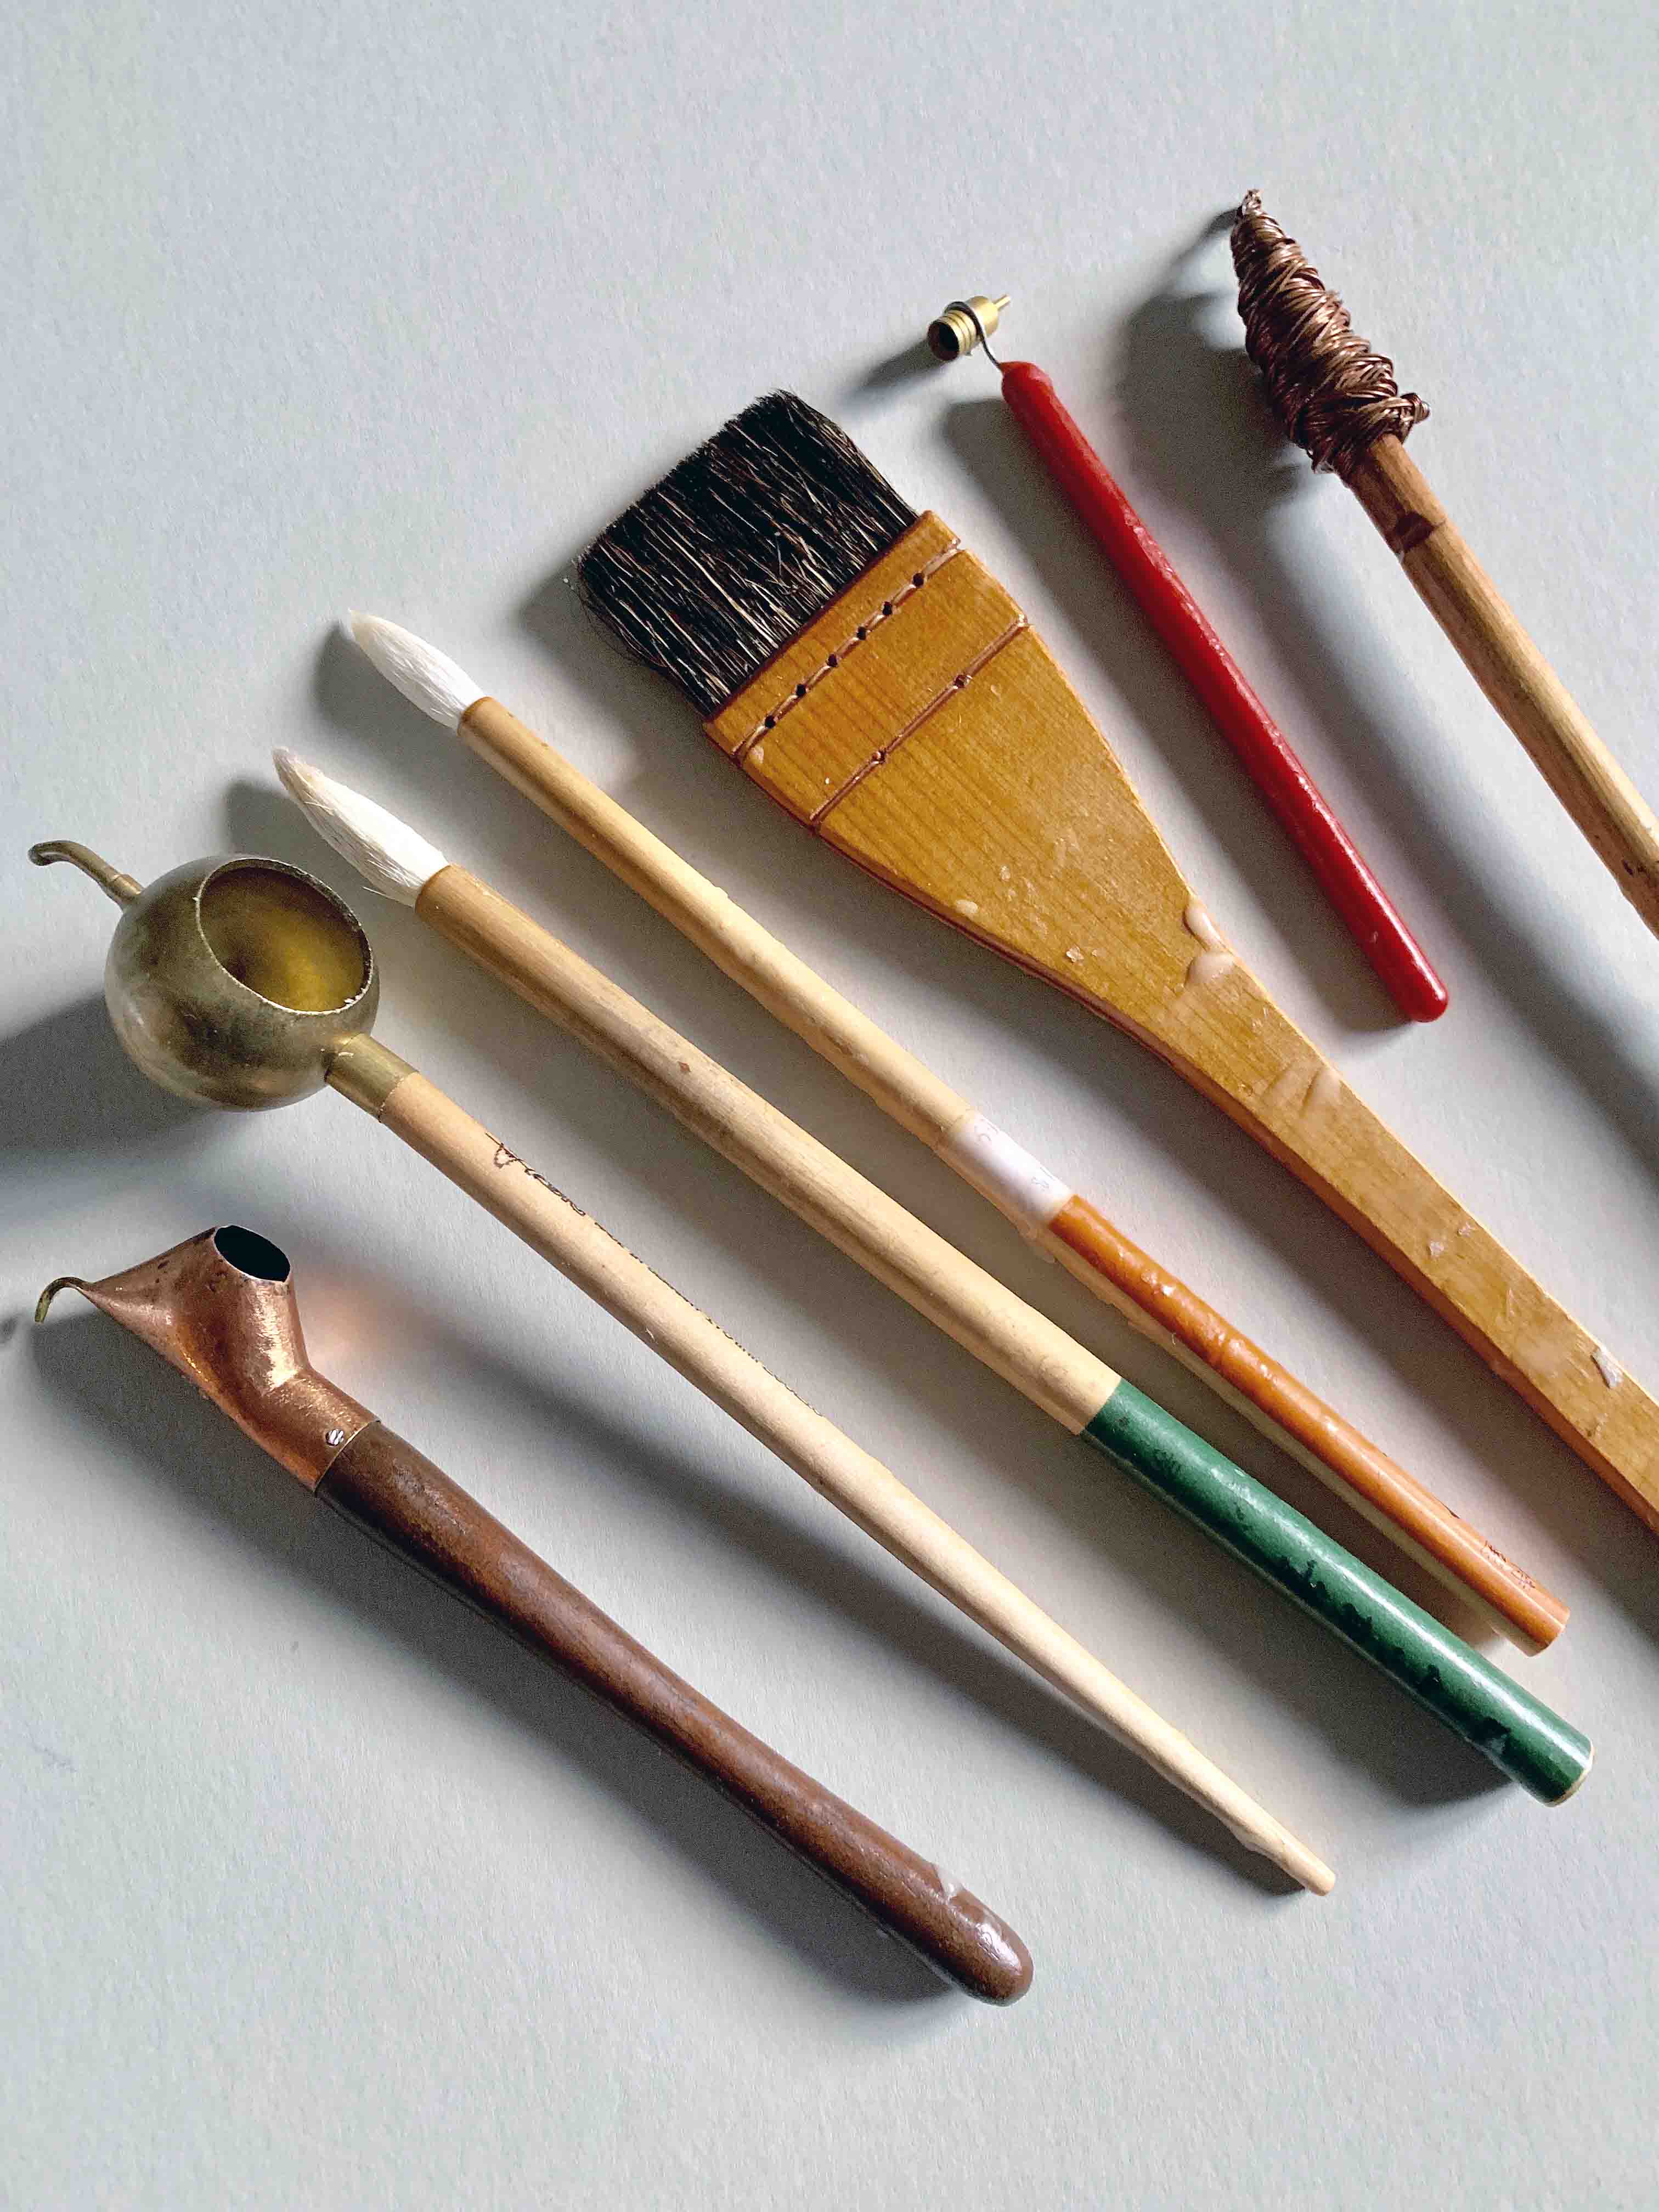
A selection of traditional (or local) tools, used to apply wax
When I originally agreed to speak I had to scratch my head a bit. I’ve never actively thought through, or publicly acknowledged, the influence that travels and observations have wrought on past and current work, and my diverse interests. On finally deciding the talk’s direction I needed a title, and kept circling Deeper than Indigo, the title of an extraordinary book by Jenny Balfour-Paul.I asked Jenny if she minded my adapting her title – and she was kind enough not to – which is just as well. Once I arrived at Deeper than Dyeing as a title I couldn’t imagine anything that worked better.
My textile treasure from The Gambia, the gift of a former student.
When unpacking after teaching at West Dean this week, I noticed one of my favourite tools hadn’t re-appeared from the boxes. I began to realise how precious the tool was, and kicked myself for being sufficiently stupid to take it out of the studio and risk losing it. The tool is no bigger than a long paintbrush, it’s clearly home-made and would look insignificant to anyone finding it but not ‘in the know’ about what it was. It could have been binned, or slipped beneath a workbench. It might never re-appear.
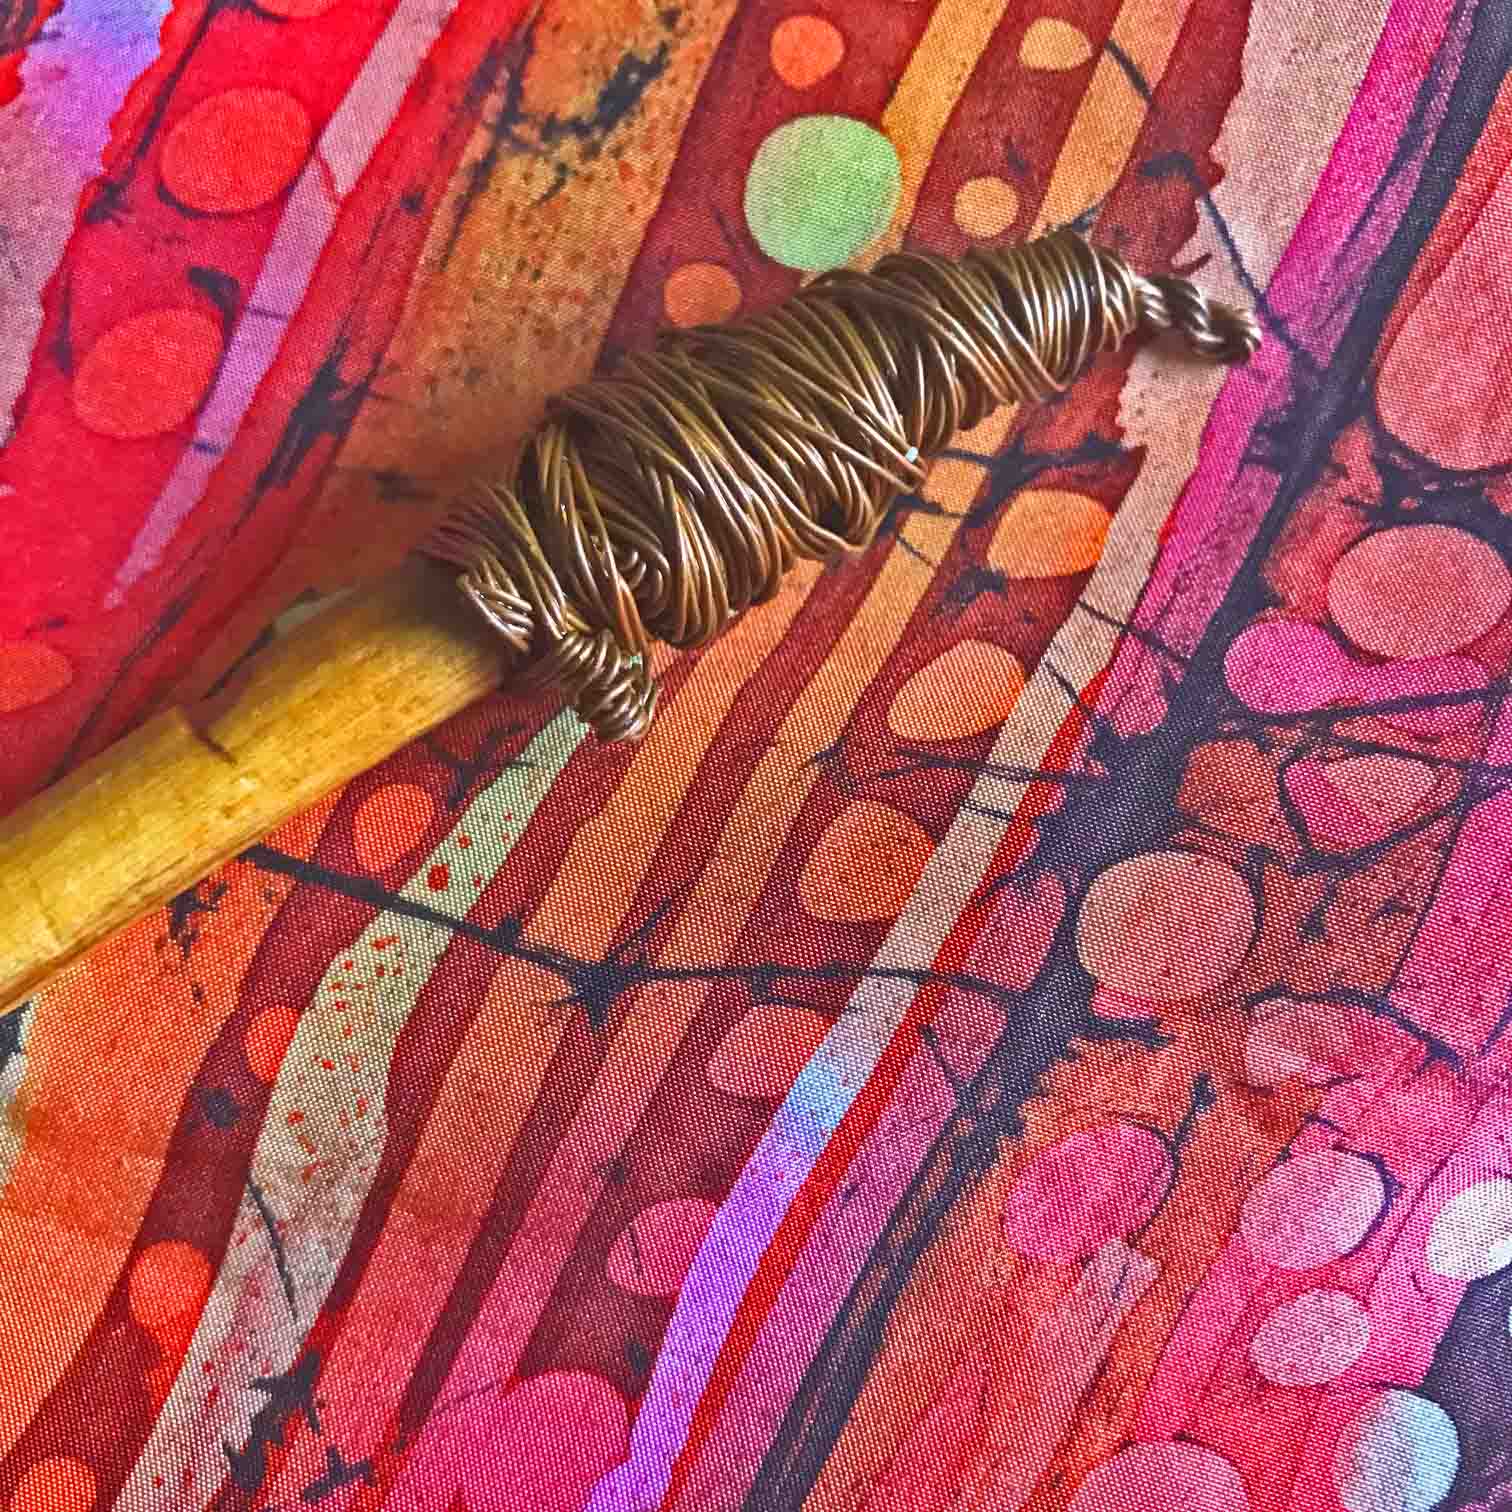
The tool, used for applying wax, was given to me nearly ten years ago by an inspiring and enterprising young student who left us with very special memories of her. She was on a scholarship studying batik world-wide and she stayed with us for a few days while I showed her how I worked. She later travelled to The Gambia, and sent me the tool on her return. It has a simply-shaped, graceful wooden handle around the tip of which is wound a casual-looking thick spiral of copper wire. The spiral forms into a tightly-twisted, spout-shaped ‘nib’.
The copper tool can be dipped into hot wax, and because copper is a good conductor of heat the entire wire quickly reaches equal temperature. The coils of the spiral hold a considerable cargo of hot wax, which flows down into the ‘nib’ allowing a controlled drawing to be made in hot wax. Experience has taught me not to start drawing until drip frequency is slow, or wax flows too fast and floods the fabric. The tool looks as though it shouldn’t work, but in fact it’s remarkably effective and one of my studio favourites.
Some time ago I tried to replicate the tool for students in my classes, using copper wire and a substantial twig, or an old paintbrush, for a handle. I have had surprising success with them and I’ve found, for instance, that a narrower gauge wire can form a finer nib. But none of my versions has the grace and integrity of the original, or carries its history. I instinctively choose the Gambia tool when working, even though my replicas work just as well.
The tool was created by people who own little and must labour extremely hard to produce their batik work: they have no electricity, gather wax from bee-hives, heat wax on a fire and carry all their water by hand. Only when I unpacked my boxes and contemplated the possible loss of my student’s gift did I acknowledge (for the first time) that the tool’s story was as important as its function.
Happily, I found it.
Link: This remarkable little book tells the story of Rushyan’s batik journey
Sketchbook pages from Madurai showing kolam designs recreated after photographing in situ
I’m recently back from a few weeks in Tamil Nadu, Southern India and this post strays from dyes and textiles to celebrate kolam. Kolam are the daily drawings drawn freehand at the threshold of houses by women, using rice flour. Designs are sinuous or angular; sometimes figurative, but usually abstract. They incorporate lines enclosing series of dots called pulli. Kolam can be found in many parts of India, where they are known by other names, such as rangoli and muggulu.
Kolam have religious and ornamental significance and there are several websites devoted to explanations on their history, making and meaning – as well as their complex mathematics. I’ve put some links below but I warn you, it’s addictive stuff.
Kolam, Pondicherry
Kolam, Pondicherry
Kolam, Thanjavore
Kolam, Pondicherry
I began to photograph kolam in Tamil Nadu because I was instantly attracted to them for their apparent simplicity, only to find them much too complex to sketch accurately in a busy, scorching street. I photographed them so that I could study them in more depth and back at the hotel I found the internet generous with explanations and video demonstrations. Thus I realised (duh) that the dots were not the embellishments I had at first thought. They were the key to the structure of each kolam and created a guide for freehand drawing of the design.
One of my courses teaches students to create patterned scarves and shawls on silk using wax resist. I discourage students drawing a design onto the silk with pencil or a textile marker to follow with wax or fluid resist. Apart from being difficult to remove, it normally saps fluidity and freedom from the drawing. I have taught that the use of small guide marks can greatly assist freehand drawing on the silk. With some experience of kolam structure I will be able to pass on these examples as inspirational freehand, yet guided, drawings.
The work I’m briefly describing here is an offshoot from a joint project. I have been researching mordant pastes (as taught by Michel Garcia) with a dyer friend; eventually we will write up our work because it isn’t yet finished. But the work we have done has made me wonder if it wasn’t the key to finding a satisfying, creative way to use natural dyes in combination with wax resist. This has been an ambition of mine since I went to ISEND* in 2011. It’s there I first came across Michel Garcia, on whose generously-shared research our mordant paste work is based.
There are technical problems in trying to combine paste with wax resist. Wax melts in the vat if it’s taken above a certain temperature, and each dye needs at least some heat to fix it. Cold dyeing isn’t an option: it would all take too long. The dyes must take their place in an ordered sequence for colour. The pH of one vat can affect colour of dyes in another layer, the wax can begin to flake off, etc. If the indigo dips are included, there may be as many as 20 operations to create one scarf, as they did in the image below. So it’s time consuming and isn’t going to produce a low-cost item, but I feel I’m getting somewhere at last. The dyes used are weld (Reseda luteola) from a British source, and indigo (a mixture of Devon-grown Persicaria tinctoria and imported powder from Tamil Nadu). The different paste resists give different shades of yellow on the base layer, including the brownish colour visible in small, thin lines and spots which came from the iron in the mordant paste.
If you signed up to my blog solely on the basis of posts on natural dyes and history, I offer apologies. This is about neither. As well as researching the history of natural dyes (in particular, orchil), I still produce work as a textile artist. Some of this uses natural dyes, but I also work with synthetic dyes on silk for resist techniques such as wax and shibori.
The Devon Guild of Craftsmen is holding an exhibition called Life Illustrated from 2nd October – 15th November 2015. Sketchbooks are the theme of Life Illustrated, showing them both as source material and as part of the creative process. A number of Devon Guild members are contributing new work, plus their precious books.
My training as an illustrator in the late 1960s was drawing-based, and I have used sketchbooks as source material for over 50 years. For Life Illustrated I decided to revisit an ‘old’ design and see how it adapted to current techniques and materials. Back then I was using a simple gutta outliner to draw the design and control the dye. Now I prefer to use wax. The design was based on drawings I made of fritillary butterfly wings. Here are sketchbook studies from 17 years ago:
Drawing from image of butterfly: pencil and watercolour
Starting to work out a design in my sketchook. Second from top shows sections cut by a sinuous line. Shapes are either positive or negative either side
The design formula divided the scarf into about nine sections. A sinuous line bisected all sections, running down on the scarf’s vertical. You can see this drawn out in the sketchbook images above although the scarf is imagined from the side. Shapes either side of the sinuous line are either ‘positive’ (dark on a light ground) or ‘negative’ (light out of a dark ground). This polarity swapped from side to side and line to line. It was logical to look at, but entirely silly to explain. Below, you’ll find a sketch showing the basic structure.
Although I sometimes archive samples, I don’t have any of Fritillary. They were large, on very good quality silk and they sold well. So I was probably too money-grabbing to keep one, which I now regret. All I have left are sketches and a rather poor image rescued from my old website.
The only image I can find of the ‘Fritillary’ design. From 1997
The top pencil scribble shows the skeleton of the design
For the exhibition Life Illustrated I made new sketches to remind myself of what had inspired me. Then I stretched a scarf, dyed the background and outlined the design with wax – in much the same way as I remembered doing with gutta. I found I was able to reproduce the old design pretty well, although the quality of the outlining wax marks is looser than with gutta. That’s not a problem with this design. So I went ahead and made two or three scarves.
One of the reasons I became tired of gutta is that it is an outlining process. All design elements are drawn carefully with the gutta pen, and dye is filled in up to the gutta line. It’s a tight technique – even a bit tedious at times because one is often reproducing a pre-planned scheme. The reason I love wax is that spontaneous brush marks can create the shapes in a design (by instantly blocking out further application of dye). Of course, one can use wax tools such as tjantings or kystkas to draw outlines, just like gutta. But I find larger waxed marks more expressive and the design evolves in a more fluid way. So my next step was to try to adapt the old design to this preferred use of waxed marks instead of outlines.
I soon realised that ‘block-out’ marks needed more space around them than the simpler outlined shapes I used years ago. Large brush marks are often textured, oddly shaped and ‘whiskery’ at the edges. In the same nine-section format, my next waxed scarf looked crammed and overcrowded. I reduced the number of horizontal divisions to five and it works better, but that’s as far as I’ve got. I’m not done with it yet.
Large waxed marks create shapes by blocking further applications of dye
The dark purple and crimson shapes are created by surrounding wax marks holding in the dye
Positive and negative: To make the ‘negative’ marks (lighter on a dark ground) I make a large waxed shape with a brush that blocks out the background. Then the background is dyed around that mark. To make ‘positive’ marks (darker on a light ground) I create an island of unwaxed silk surrounded by a sea of freely waxed marks.
Teaching: On Sunday I’m off to Warwickshire to teach at the Summer School of the Association of Weavers, Spinners and Dyers. I’ll be running two courses back-to-back introducing wax resist on silk.
I will be teaching three times at West Dean next year (March, May and July) but if you want a place, please book early. The March course already has a waiting list.
I’m also running a one-day introduction to wax resist on silk at Ardington School of Crafts next month (September). Please contact these venues for information (links below) and see my courses page.
No posting recently because I’ve had a month of intensive teaching followed by intensive feet-putting-up. I ran three courses at Ardington in Oxfordshire and then four days in Nether Stowey at the studio of Janet Phillips.
Several vats on the go
Cochineal and indigo
Cochineal and indigo
At Ardington School of Crafts I taught my synthetic dyes shibori day, plus two one-day (repeated) courses on natural dyes. The natural dye course is a taster to a fascinating subject with some practical work at the dyepots, but also intended as an eye-opener to textiles seen at a stately home, museum etc. It’s even relevant to looking at paintings: I often wonder what dyestuffs were used on garments represented (with pigments) in a historic portrait. We had to move fast, with all fibre and fabric pre-mordanted, and an indigo vat ready to go. Most students dyed a scarf using simple immersion methods. We used madder, weld, cochineal and two indigo vats (one weak, one strong).
At Nether Stowey, I taught a three-day-dye course to several of Janet’s graduates from her Masterclass. On day one they learned some shibori folds using steam-fixed dyes; day two gave them a taster of wax resist, and day three was a full day with indigo. At the same time as I taught dyes, Janet was teaching ‘shibori on the loom’ to students from the London Guild. In this technique, removable weft threads are incorporated into the weaving. They are later used to draw up the cloth tight. According to how the shibori threads are woven, patterns emerge after the piece is dyed, then opened up.
Students used coloured and plain warps, on different pieces. Some of this shibori work was put into my indigo vat on day four; others used Janet’s fibre-reactive dyes which were applied by placing woven pieces into a short length of gutter (brilliant idea) and painting by hand. I am used to folding, tying and clamping for indigo work and although I have seen loom shibori before, I haven’t watched the whole process from start to finish. A combination of enthusiastic and knowledgeable students, Janet’s teaching and the imaginative arrangements made by Janet and Nigel made for a very enjoyable week. Did I mention glorious weather?
Loom shibori gathered up for dyeing
Undyed loom shibori being opened
Indigo-dyed loom shibori
Fibre-reactive dyes applied to loom shibori
Indigo-dyed loom shibori
Many thanks to students at Ardington and Nether Stowey for permission to use images of their work.
Teaching in 2015
Dates of next years’ courses are accumulating. I will be tutoring two courses at the Association of Guilds of Weavers, Spinners and Dyers Summer School in August 2015 at Moreton Morrell. Details of the entire event can be seen here and there are details on this page.
I am teaching a new one-day introductory course in wax-resist at Ardington School of Crafts in 2015 as well as days on shibori scarves, indigo dyeing. The Vibrant World of Natural Dyes proved very popular this year and I will be teaching it again in 2015: I have one course at West Dean scheduled for March. If you want to sign in, do so soon because my October course has been full since April.
I’ve been working on a set of scarves in which the first layer of dye is more than usually vital. In layered wax-resist one works by blocking out, or outlining, existing dyed areas. This effectively ‘leaves them out’. One then adds more dye for the next layer of the design. This sequence of dye – wax – dye – wax can go on more or less indefinitely until there is no room left on the fabric, or the silk is saturated with dye and will take no more.
In this way the first layer of dye, if applied in a lively and varied way, can still work its magic when the silk is covered with several more layers. If wax outlines are used in a design, these, or the areas they define, will appear as interesting as the layer of dye they cover or isolate. This new design, which I’m calling Fish and Fowl, relies on lines, outlines and areas of lighter and dark tone.
Two frames with first-layer dye plus finished scarf
First layer wax on first layer dye
Work in progress: second layer dye
Detail, finished work
I was teaching the principle last week at West Dean on my Brilliant with Pattern course: it’s hard to explain to students verbally and far easier by means of examples, demonstration and encouraging them to ‘have a go’ on experimental sample silk pieces.
Student’s work, showing colour shift of under-dye from pink to yellow.
Student’s work showing build up of dye and wax
My October course at West Dean is already full, but if you would like to learn the wax and dye technique along with some basic shibori, it’s worth adding your name to the waiting list. A further course is sometimes arranged if there are several people waiting.
Otherwise, I will be teaching Brilliant with Pattern at West Dean again at the end of March 2015.
If you want to book, look out for the Winter short courses programme which will be available from the West Dean website.