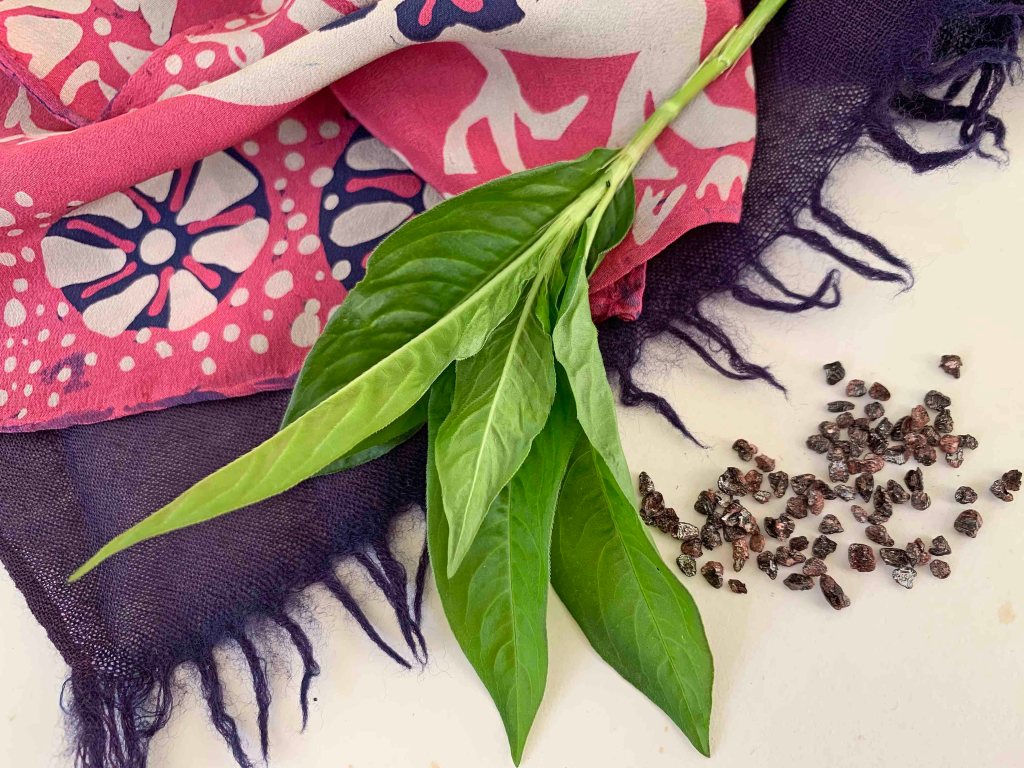
Top left: wax resist scarf dyed in indigo and cochineal; leaves of Persicaria tinctoria and cochineal grains. Underneath left: fringed wool scarf dyed a deep purple in cochineal and indigo
Teaching has so long been off my radar I can’t quite believe that my first course for 18 months is rapidly approaching. I will be at RHS Rosemoor in North Devon on 25th and 26th September for a hands-on introduction to using natural dyes. With a bit of luck students will end up as bonkers as I am about natural colour and its ancient history – and will leave with a great set of dyed samples and a beautiful, individually-dyed scarf.
For overseas readers, RHS stands for the Royal Horticultural Society. The RHS is the UK’s leading gardening charity and owns five beautiful gardens across the country. RHS Rosemoor is one of them and it’s just up the road from me. I have visited it countless times since I moved to Devon nearly twenty years ago. On my visits I often noticed some of the plants that yield dye colour and thought it would be a wonderfully appropriate place to run a course.
In 2019 I contacted the Education and Learning Manager and found her to be very receptive to the idea. The Manager was the late Sarah Chesters, a bright, funny and delightful gardening expert who was also very knowledgeable about textiles and fibre. She was engagingly interested in all I told her about natural dyeing and came to my house on a memorable day when I was working with Jenny Balfour Paul: we showed her how my indigo crop was processed, shared lunch, and we all laughed a lot.
So I was very saddened to hear that Sarah died earlier this year, and I will actively remember her warmth and humour when I am teaching at Rosemoor.
A whole extra pile of mail arrives before Christmas in many British households. This is the seasonal appearance of greetings cards from family, friends, neighbours, and sometimes local businesses. In my case, several cards represent the sole contact I have with ‘old’ friends and I actively anticipate their arrival to hear everyone’s news. News isn’t invariably happy, of course, and the saddest cards are those that don’t arrive at all.
Wax resist and steam-fixed silk dyes on silk pongee, 2020
Almost without exception this year’s cards express the anguish of the past months and the hope that 2021 will be better. Among my extended friends and family there have been job losses, health and financial crises, cancelled celebrations, stranded travellers and separated families. I also learnt of the cards that will not make an appearance.
Wax resist and steam-fixed silk dyes on silk pongee, 2020
It hasn’t all been bad. One of the better outcomes of the year’s crisis has been the communication enabled by such platforms as Zoom. I chat to student friends regularly, and have caught up with people who live abroad or far away, or I haven’t seen for several years. I’ve attended an online conference, several lectures, an AGM, a charity concert, various makers’ fairs, and yoga classes. I’ve ‘met’ longterm online correspondents – and liked them as much as I thought I would.
Wax resist and steam-fixed silk dyes on silk pongee, 2020
The beautiful summer weather assisted a stellar indigo crop to mature and I had enough left over from dyeing to make pigment, and contribute to a research project into Japanese indigo. In the last couple of weeks I delivered a batch of scarves (pictured above) to the Devon Guild of Craftsmen, an organisation that has courageously fought for survival through 2020 and is attracting good sales now that it has been able to reopen. My studio output this year has been meagre because I have been occupied by the complicated business of everyday living, but it felt good to deliver a few new pieces of work at long last. Dr Denim, my contribution to the Guild’s annual Members’ Exhibition, won the People’s Choice Award in November. You can read about much of this work in previous posts.
Thank you for following, reading, contacting me, and commenting. May all your 2021s be an improvement on this stressful year.
Like many, I felt the urge to grow-our-own veg at the panicky beginning of lockdown. However, I decided that were food to run short, our veg patch wouldn’t sustain us for long. So I took a chance and grew indigo.
In this previous post you can read about how I grew three types of Japanese indigo over the summer and compared some dyed results. I worked on wool and silk.
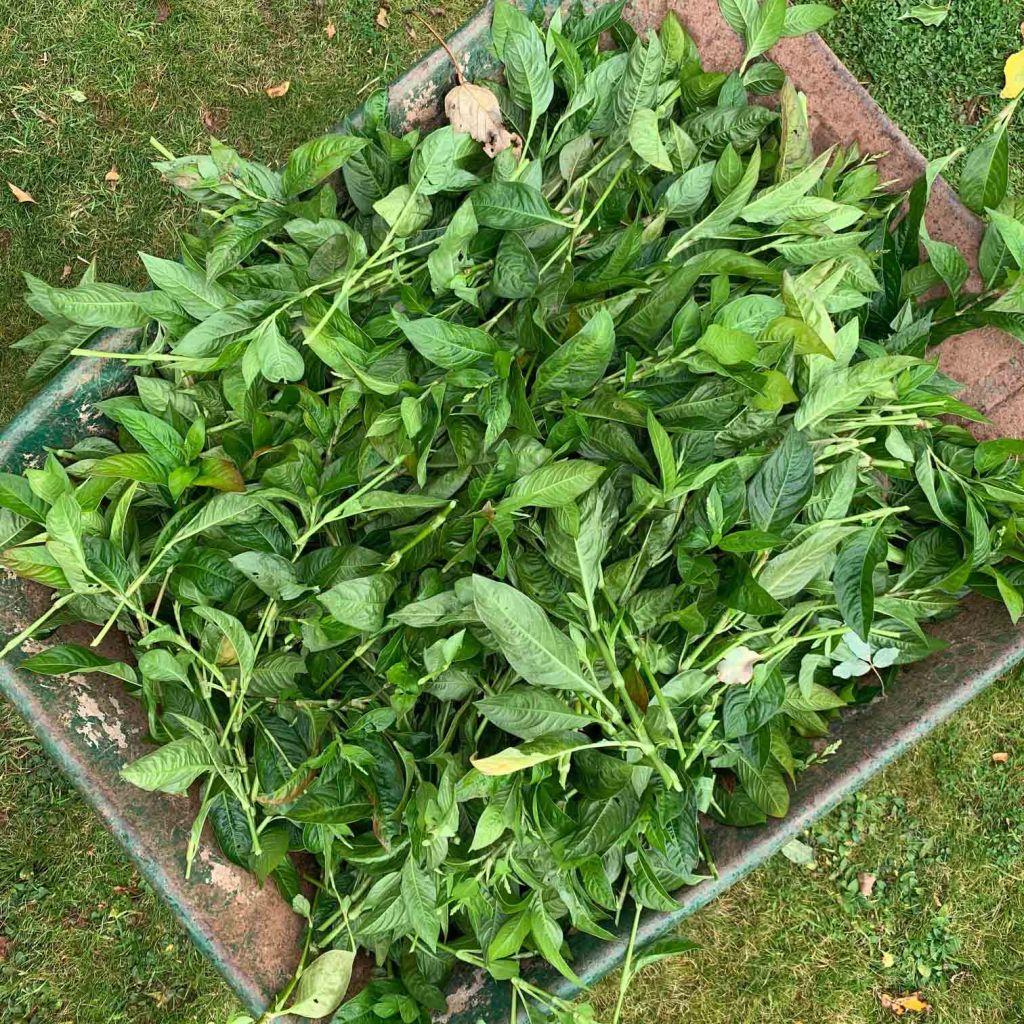
With the fragrant assistance of 6 sacks of chicken poo I produced my best crop of indigo ever. It grew tall and bushy and cropped heavily in August and September, until flowers started to form. (The general view is that indigo content starts to wane after flowering starts). As the plants are frost sensitive and autumn is definitely here, I am swiftly using up part of the remaining crop to make pigment, preserving the most advanced flowering stems to produce seed. I am obtaining good strong blue from the extractions despite the presence of flowers. At this stage I am picking and mixing leaves from all the plants regardless of type.
A wheelbarrow jammed full of cut stems from all three types of plant. It takes around 3 hours to strip the stalks on my own and a wheelbarrow makes a small jar of pigment
Normally in late summer, groups of local friends plus grandchildren gather to help process each other’s leaves and have fun dyeing day together. It couldn’t happen this year, for obvious reasons. But my crop has been so successful that pigment making has been a very lengthy and solitary process – except when our useful collie intervenes with her personal views on processing.
Many rather more experienced dyers have written about preparing pigment and I have been specially reliant on the advice of Jenny Balfour Paul and Jane Deane, plus the book ‘Singing the Blues’ by John Marshall. Versions tend to differ slightly, but I have produced some respectable-looking pigment.
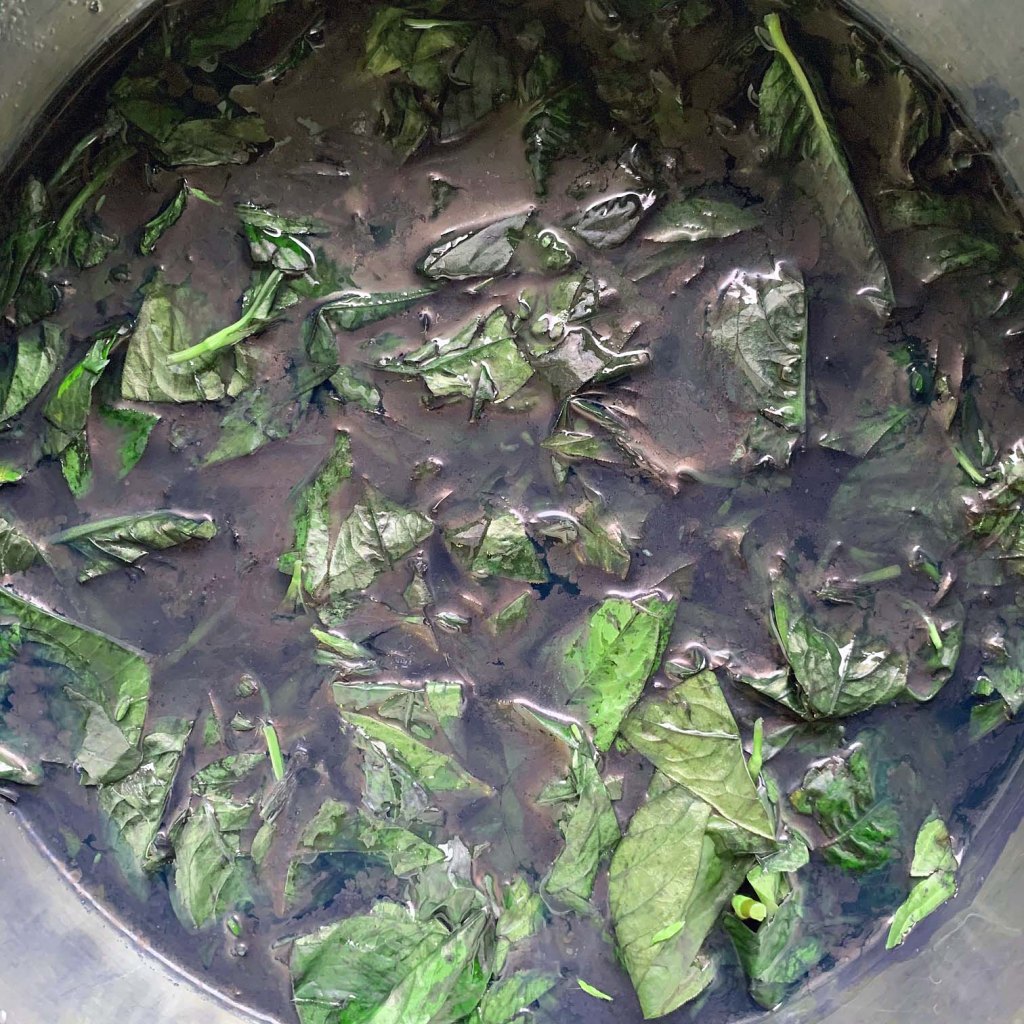
On the left above you can see stripped leaves in a stainless steel bucket. On the right the leaves are shown post-extraction. Note the blue bloom on the surface
Left above: squeezed out leaves can be composted. On the right, lime has been added and the mixture aerated
On the left above: mixture is being passed through a coffee filter. On the right the dried paste is being ground back into powder.
The pigment making process I used
Leaves are stripped from stems and placed in a stainless steel vessel with enough rainwater to cover. Mixture is heated to no higher than 60C (140 F) over about an hour, held for a further hour, then left to cool overnight. I pound the leaves gently with a wooden pole. Leaves are sieved out, and squeezed over the bucket. Squeezed leaves can be composted.
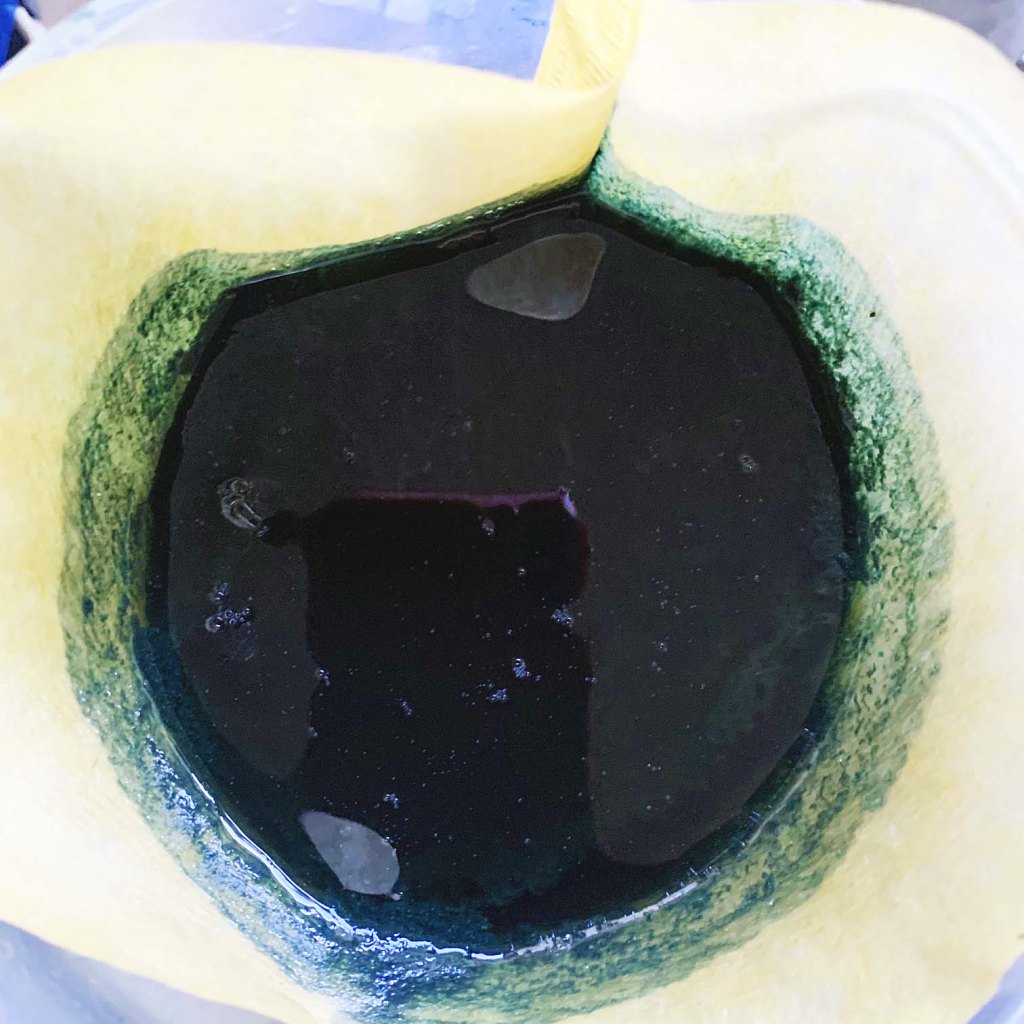
Hydrated lime is added to the mixture: I use a teaspoon in my 8 litre vat. I then aerate the mixture with a balloon whisk, or with the wooden pole, or by passing the mixture from one bucket to another. It becomes foamy at the top and the foam will slowly change to blue.
I usually transfer the bucket contents to several smaller vessels. Once the mixture settles it is possible to (carefully) pour off the clear liquid at the top of each vessel.
The remaining contents are passed through a coffee filter resting in a plastic funnel over a coffee jar, or similar. If the liquid dripping through appears very blue I pass it through again. When the filter only contains blue paste I open it up on a tray and gently scrape off the paste with a spatula.
The paste is dried: I put more on the top of the boiler where it is kept gently warm all the time.
Mixture is ground in a pestle and mortar. I use a facemask for this stage: the powder easily becomes airborne.
I’m trying to use my Japanese indigo (Persicaria tinctoria) before frost hits and kills it, and it won’t be long. I planted it late this year and have only managed 5 ‘picks’ which were made around 15 days apart, to allow for regrowth. I had enough prepared work to dye in the first vats, but for the last two ‘picks’ there was nothing ready. Not wanting to waste the precious crop I have endeavoured to make pigment, which basically involves reducing (by evaporating) the indigo, in its alkaline, oxygenated state, down to a thick paste, and then powder. This can be reconstituted into a dye vat at a later date.
Japanese indigo growing in Devon
Leaves in water heated in a bain-marie arrangement
First filtration through gauze
Filtered liquid still contains indigo
Indigo paste
Drying paste
Dried out paste
A friend helped me with basic instructions but mostly I had to experiment. I probably wasted some indigo because I didn’t find a way of filtering efficiently. There also seems to be more leaf material in it than I hoped as it looked greeny-blue at paste stage. In a hot, dry climate like India shallow containers of liquid evaporate fast but here it took days, even on the top of the central heating boiler. It was a race to evaporate the goo before it went mouldy. I forgot to weigh the leaves but I think there was about 1 kg, which reduced to 5.3 grams of indigo pigment. There is a full explanation of the way I process Japanese indigo before the evaporation stage here so I won’t repeat the method.
Bideford Black
With pigment-making on my mind, I went to see the new exhibition at the Burton Art Gallery and Museum at Bideford. It’s called Bideford Black: The Next Generation and it centres on a rare and beautiful black earth pigment which emerges from the North Devon cliffs. In the past ‘Biddiblack’ (as it was known), has been used in paint manufacture, for making mascara, camouflaging military vehicles, in boatbuilding etc., and commercial mining for it continued until 1969. Artists working in a traditional manner, or with traditional materials, have valued its velvety dark strength and subtle tones. I had a chance to try it in the Burton Gallery last week, as can all visitors to the show. Bideford Black: The Next Generation is an unusual and unconventional exhibition and it’s certainly not traditional: participating artists responded to the pigment in diverse and often thought-provoking ways. Links below.
Grinding Bideford Black
Sizing stretched calico with soya milk
Stretched and sized Ahimsa (Peace) silk painted with different concentrations of pigment, made as a sample
Bideford Black and local earth pigment combined
Masked plate in background ready to roll up with Bideford Black pigment
‘Ghost print’ from my original drawing from the RJ Lloyd Collection of Devon ceramics
Inked plate after first impression. Drawing made from RJ Lloyd Collection of ceramics
I wanted to find out if the pigment could be painted onto sized cloth and the exhibition organisers offered me some Bideford Black to take home and try out. Using a rare pigment 300 million years old was moderately inhibiting and my efforts also felt stuffy and old-hat after seeing the exhibition. Nevertheless, stuffy and old-hat is what I do, so I got on with it.
Using the soya milk recipe generously published online by John Marshall (see link below) I stretched and sized silk and cotton and worked experimental pieces. I wasn’t trying to make anything, just seeing what the pigment would do. The black was initially ground in a pestle and mortar and then mixed with more soya milk as a binder. I found that a small amount of gum arabic assisted in holding it together, stopping moisture bleeding outwards from painted shapes. The fabrics now need to cure.
Finally in this tale of blue and black, I was lucky to book a place on a monoprint workshop run at The Burton by Grizel Luttman-Johnson. We inked up perspex plates with Bideford Black printing pigment, which Grizel had prepared by grinding and mixing the Black with a binder and linseed oil. We then placed paper on the inked plate and made drawings on the reverse of the paper. Pressure caused ink to be picked up and an impression made on the front of the paper. The plate could be used again to pick up a ‘ghost print’, which created a kind of negative image. It was a very enjoyable day, well-led by Grizel.
Some links to the Blog for Bideford Black: The Next Generation
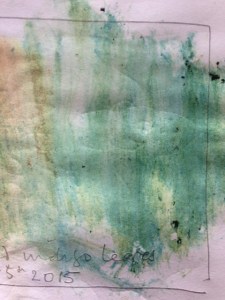
Blue stains which developed after rubbing Japanese indigo leaves onto paper
I planted out my Japanese indigo (Persicaria tinctoria) several weeks ago, having grown it all from seed. This week I picked some leaves and rubbed them on the page of my sketchbook to see if any blue appeared. It did (ignore the buff coloured stain to the left of the image, which is nothing to do with it). From this I knew that I could make a vat from the crop.
I began by picking half a bucketful and testing it as a small vat. I achieved a very good blue, which was used to overdue some cochineal-dyed scarves I had shibori-tied ready and waiting. You can see the result in the gallery below.
On the second vat I used a whole bucketful of leaves, rammed down hard. I just pick the tips, like tea: not the whole stalk. I sometimes weigh the leaves before processing but the material was wet after rain and there didn’t seem much point. I don’t always strip the leaves from stalks either, so a known dry weight is somewhat academic because the stalks don’t, as far as I know, produce any colouring matter.
On the day I dyed the second bucket I live-tweeted the various stages with images and received a good response. I think more and more people are trying to grow, and dye with, their own indigo.
With colleague Christina Chisholm I co-authored a piece on growing and using Japanese indigo for the Journal for Weavers, Spinners and Dyers in 2011. It was a free download and you can still access it here so I don’t have to write it all out again. We included some information on growing the plant in two distinct climates (Devon and north east Scotland). Christina has much more experience with dyeing wool, so fibre dyers might find her comments useful. If I were to be able to edit the article I’d make a couple of additions / amendments:
1. I have since found that I don’t always see a blue froth when I whisk up the strained dye bath. Instead, the sherry-coloured liquid darkens and looks greener – but the froth is often colourless. Why? No idea. These days I have stopped using soda crystals and use washing soda instead. Maybe that’s the reason.
2. I have found that leaves are often ready whether or not they have the red/blue tinge shown in the Journal download document. What I have heard since (but don’t know if it’s true) is that you need to use the leaves before the plant produces flowers.
3. I try to encourage flowers for seeds each year and there is some urgency about this as in the UK the plants die with the first big frost. I mark a few vigorous stalks early on by tying a conspicuous ribbon round each one. Then I can’t pick them by mistake. I let these stalks develop flowers as early as possible.
Leaf tips after gathering
Bain-marie used to heat leaves in water
Leaves are crushed in the liquid
Leaves are sieved and squeezed out
Passing liquid from bucket to bucket to oxygenate
Liquid after addition of washing soda and oxygenation
Back in 2011 photographer Steve Kenward started on a mission. It was to be an unfunded personal project, of more or less infinite scope, which he called Made Not Manufactured. His idea was to travel the British Isles to photograph ‘people that use traditional crafts to make something that still has relevance today.’ Steve’s paid work as a freelance photographer would fund the entire project which includes his travel, accommodation, and any other personal expenses.
He put the word out for craftspeople / participants through the Heritage Crafts Association (HCA) and soon found that makers of objects such as baskets, boats, rakes, bowls, knives and clocks began to contact him. You can see the results of this committed photographic portrait of British craftsmanship on Steve’s website here. I contacted him as a dyer, and feeling that natural rather than synthetic dyes were more relevant to his ‘traditional’ aims, I made an indigo vat from my crop of Persicaria tinctoria for his day in my dyeroom. Up in my studio I worked with a beeswax resist on the beginning stages of a silk scarf. With Steve’s permission I am including some of his images below.
Steve has photographed 43 craftspeople (plus 13 dogs, including mine) and travelled 5,300 miles – at the last count. Until yesterday, I believed his arrangement to exhibit the complete body of work at the Weald and Dowland Museum in Sussex in August was still going ahead. It seemed the ideal venue to celebrate the work of so many makers, some of whom were prepared to demonstrate their craft, and show Steve’s unique collection of photographs. But something has gone seriously amiss; it seems there is no funding to support the exhibition project and the arrangement has been cancelled.
I feel disappointed for Steve who has worked extremely hard to achieve his aims. He is an unobtrusive but enquiring observer as his photographs demonstrate but also a delightful guest: even the dog approved, although she took exception to having a tripod in the house.
Steve is now looking for another exhibition venue for this body of work. If you know of somewhere suitable, please contact Steve through his website and while you’re there view other images of his impressive project.
Footnote: I resolved that my dog would never appear on this blog, but here she is, as seen by Steve Kenward. As today is her 100th birthday in doggy years, I think there is something to celebrate.