
Colophon from after 1850
The Bedford family of Leeds The Bedford family first started manufacturing orchil, a purple dye made from varieties of lichen, in around 1820. Orchil-making was a skilful process relying on fermentation, and dye vats could be expensively spoiled through inattention or inexperience.


Printed matter from early days of manufacturing. The name ‘Wood’ was retained after the death of Edward Wood, a sales partner from around 1850
Three successive generations of enterprising Bedfords steered the expanding manufacturing company into the 20th century, with achievements stemming from knowledge of new research and techniques, coupled with their inventive outlook. This period saw them incorporate synthetic dyes into their manufacturing, but their use of natural products for tanning and dyeing continued into the mid 20th century. The company changed names several times, but there was never a takeover. As ‘Yorkshire Chemicals’ the business finally folded in the early 2000s: by then there were no Bedfords in the company.
Charles Samuel Bedford (1865 – 1945) In 1880 – 81, Charles Samuel Bedford, grandson of founder James Bedford, attended the Yorkshire College to study chemistry. There was one other student: Arthur George Perkin, the second son of Sir William Henry Perkin whose 1865 discovery of a synthesised purple dye known as mauveine had revolutionised the dye and chemical industry. The meeting of these two young students developed to a lifelong connection when Arthur married Charles’ sister Annie. Arthur and Annie spent their lives in Leeds where Arthur worked at what became the University of Leeds. Strong social ties existed between both families.


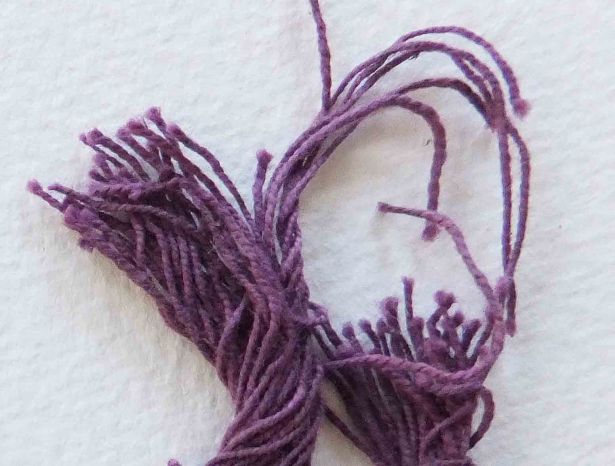
Connections Family, scientific, and working connections of the Bedfords may explain why samples of genuine Tyrian Purple arrived in the archive. There was no commercial or industrial potential in shellfish dye so one can assume there was a purely academic interest in dyeing and retaining them.
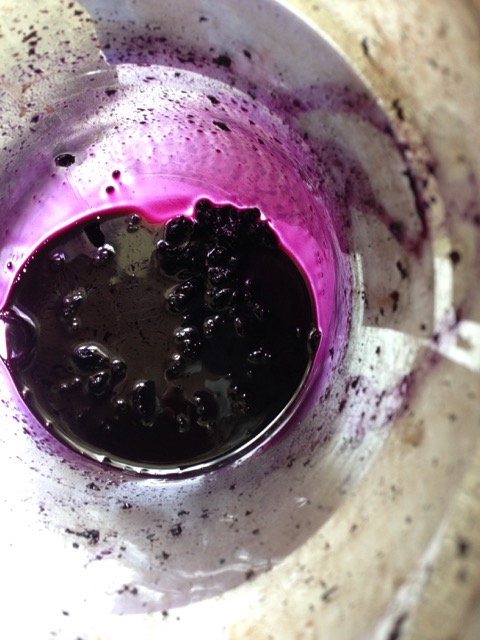
What did the dyer of the Tyrian Purple need to know? Zvi’s photomicrographic images of the purple threads confirmed that the samples were evenly and homogeneously dyed, meaning that they were dyed, not smeared by direct application. Therefore, two key pieces of knowledge had to be in place to vat dye the cotton threads. The dyer needed to know that the shellfish pigment was an indigoid molecule, and that a reduction vat was required.
Knowledge of the hydrosulphite reduction vat was first presented in 1873 by Schützenberger and Lalande. Paul Friedländer’s work in 1909 Vienna determined that the main component of purple pigment from shellfish was an indigoid, namely dibromoindigo.
Scientific connections to the Bedfords were strong, coming from the wider Perkin family, and the Yorkshire College (later the University of Leeds) where Arthur worked. Latest research would have been quickly accessible.

The envelope containing the two small skeins of shellfish dyed cotton: labelled in Charles Bedford’s handwriting
Tyrian Purple, known as the ‘Purple of the Ancients’ was a well-discussed subject and appears in 19th century literature associated, as ever, with wealth and status. The Bedford and Perkin families already represented two historic purples – orchil and mauveine – and one can imagine their curiosity about the dye chemistry of this exotic third.

- Demolition site, Yorkshire Chemicals, Kirkstall Road, Leeds, 2008
The demise of Yorkshire Chemicals The Bedford family’s original business changed names several times over its lifetime, but there was never a takeover. It went into receivership in around 2004 styled as Yorkshire Chemicals. The factory on Kirkstall Road, first occupied by the Bedfords in 1850, was abandoned. I visited the demolition site in 2008 and felt unexpectedly emotional. Rising smoke, derelict buildings and heaps of twisted metal seemed the only legacy of a proud family’s early endeavours.
The Phoenix But there is now an upside. The envelope of purple threads falling from hinges of an upturned rusty trunk has restored to us genuine samples of fabled Tyrian Purple. They are the first ‘modern’ dyeings known since the 15th century, which illustrate scientific connections of the time as well as the curiosity, inventiveness, and the achievements of a Leeds family. To use Zvi’s words once more, the samples are like a ‘Phoenician rising from the rubble’, serving as a testament to past working and family lives of the Bedfords – and so many like them. They are, quite simply, Tyrian Treasure.
If you are interested in knowing more about any aspect of this research please write to me via the blog contact page.
Thanks
Many thanks to colleague and friend Zvi Koren for his knowledge, his diligence and his support, and for his comments and additions to this pair of blogs. And for not forgetting to see the punny side of things.
Links and bibliography
Whitworth and Koren paper published in Ambix. Available from Taylor & Francis Online here.
Ancient shellfish used for purple dye vanishes from eastern Med Guardian article , December 5th 2016
Related posts on this blog
Dyes, History, and a Chilly Trip to Yorkshire
Inge Boesken Kanold artist researching and working with shellfish pigment
The Edelstein Center for the Analysis of Ancient Artifacts
John Edmonds’ book: Tyrian or Imperial Purple Dye: The Mystery of Imperial Purple Dye, Historic Dye series no. 7, Little Chalfont, 2000. Published by the author.
 The Guardian: Monday 5th December 2016.
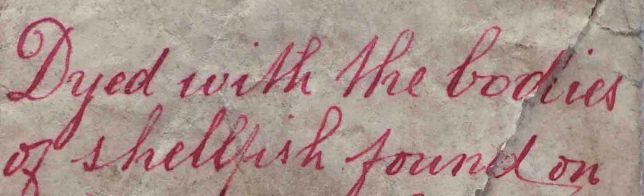


 The inset image shows a diagram of the original design of the banner but is very poor quality because it was taken through glass at a difficult angle. The original colours are listed as red, yellow, purple and silver.